码农code之路
一、Spring注解
1.组件扫描
Spring3.0后为我们引入了组件自动扫描机制,它可以在指定包及子包底下寻找标注了@Component、@Service、@Controller、@Repository注解的类,并把这些类纳入进spring容器中管理。它的作用和在xml文件中使用bean节点配置组件是一样的。
2使用自动扫描机制步骤
a.spring配置文件增加空间与xsd的引用,使用注解开发,需要context组件解析配置文件,要增加开启组件扫描的标签配置
<context:component-scan base-package="com.dfbz"></context:component-scan>
b.在组件bean上定义类注解,在组件bean的依赖属性上,定义依赖注解
3.注解开发实例
3.1环境搭建
新建spring项目,并引入依赖
<dependency>
  <groupId>org.springframework</groupId>
  <artifactId>spring-context</artifactId>
  <version>5.0.6.RELEASE</version>
</dependency>
3.2.配置spring配置文件
<?xml version="1.0" encoding="UTF-8"?>
<beans xmlns="http://www.springframework.org/schema/beans"
       xmlns:xsi="http://www.w3.org/2001/XMLSchema-instance"
       xmlns:context="http://www.springframework.org/schema/context"
       xsi:schemaLocation="http://www.springframework.org/schema/beans http://www.springframework.org/schema/beans/spring-beans.xsd http://www.springframework.org/schema/context http://www.springframework.org/schema/context/spring-context.xsd">

    <context:component-scan base-package="com.dfbz"></context:component-scan>
</beans>
注意:
输入context:component-scan标签名,idea会智能的自动添加命名空间和引入xsd文件
其中base-package为需要扫描的包(含子包)。

3.3 编写一个HelloWorld类,交由spring容器管理
import org.springframework.stereotype.Component;

@Component
public class HelloWorld {
    public void say(){
        System.out.println("--你好世界!--");
    }

}
3.4 单元测试
public class Application {
    @Test
    public void test1(){

        ClassPathXmlApplicationContext app = new ClassPathXmlApplicationContext("application.xml");

        HelloWorld helloWorld = (HelloWorld) app.getBean("helloWorld");

        helloWorld.sayHello();

    }
}
二. Spring常用注解
1. Spring项目程序架构
1.1 面向接口编程
面向接口编程:在系统分析或架构设计中,每个层级的程序并不是直接提供程序服务,而是定义一组接口,通过实现接口来提供功能。面向接口编程实际是面向对象编程的一部分。
1.2 面向接口编程-优点
接口的定义和接口的实现分开
- 从分工看,接口定义一般是由架构师来设定,编程人员实现,架构师会根据架构规则、设计规则来制定接口,对编程人员提供了规范。
- 从实现看,接口的定义时间很短,但接口的实现时间较长,若一个编程人员需要调用其他人员编写的某个方法时,可以采用多态的方式获取接口对象,来调用方法,这样保证团队共同完成开发。
- 从架构设计看,接口实现分开,程序更清晰,易读。
接口可以有多个实现:
- 如果实现类的业务需要扩展某项功能,可以采用重新实现接口的方式,这样降低了程序的冗余性。
- 接口的多实现易于通过配置文件的方式配置接口的实现类。
Spring是通过面向接口编程结合IOC实现软件层的解耦
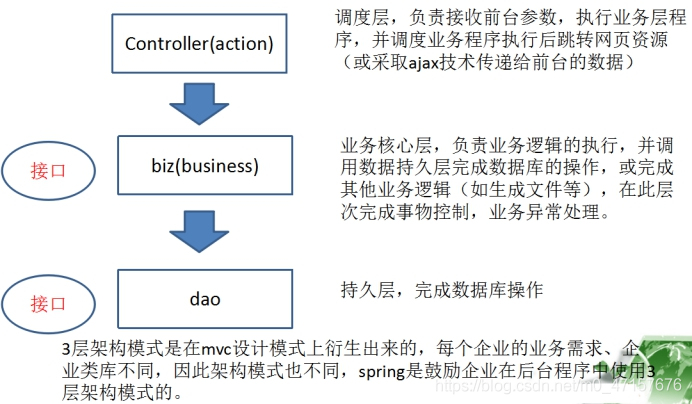
1.3 Spring的三层架构
2 用于对象的注解
我们将用于被扫描创建对象的注解,统称为组件注解。
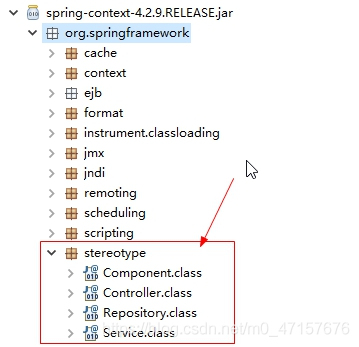
组件注解包括:@Component,@Controller,@Service,@Repository。
- @Controller:用于声明表现层的组件注解
- @Service:用于声明服务层的组件注解
- @Repository:用于声明持久层的组件注解
- @Component:用于声明三层以外的通用组件注解
组件注解的功能都是标识类为注解的组件类,启动Spring框架的程序时,声明将这些组件类注入到Spring容器里面。意味着,只有加了这四个注解任何一个注解的类,在程序启动的时候,Spring就通过配置文件指定的路径将该路径下的所有带组件注解的类创建对象并且放在容器里面。
功能类似原来配置文件的标签
问题:明明一个@Component注解就可以满足了扫描的需要,为什么要有四个呢?
答:其实Spring第一版注解的实现(spring 2.5),就是使用一个@Component。从3.0以后,作者认为根据分层的需要,把它拆成了四个。为了可以让开发人员,可见即可得,一看到注解,立即知道类的性质。所以分成了四个
问题:那么,这四个注解交换使用会报错吗。如:持久层,我放@Service标记。
答:处理@Controller在SpringMVC里面有强制的要求,SpringMVC的表示层必须使用@Controller组件注解。其他情况,用乱了是不会报错的,不过我们必须不能用乱。不遵守规范,不然别人无法跟你一起开发了。
组件在spring-context-4.2.9.RELEASE.jar包里面。
3.用于依赖注入的注解
回顾:XML配置文件使用实现注入的。通过注入注解也可以实现。
CustomerService
package com.dfbz.service;

import org.springframework.stereotype.Service;

//注入到IOC容器中(名字默认为类名首字母小写customerService)
//@Service("customerService")
@Service
public class CustomerService {

    public void save(){
        System.out.println("保存方法");
    }
}
3.1. @Autowired注解
@Autowired注解:用于根据类型给引用注入容器的对象。
属性required:指定注入的对象是否允许为空,如果required=true(默认值)。表示不可以为null,false表示可以为null
使用@Autowired注入的三种情况
a.在属性上面注入(可以省略setter方法,常用)
@Controller
public class CustomerController {
    @Autowired
    private CustomerService customerService=null;

    public void save(){
        System.out.println("controller保存customer");
        customerService.save();
    }

}
b.在方法上面注入
@Controller
public class CustomerController {
    private CustomerService customerService=null;

    @Autowired
    public void setCustomerService(CustomerService customerService){
        this.customerService=customerService;
    }

    public void save(){
        System.out.println("controller保存customer");
        customerService.save();
    }

}
c.在构造方法上面注入
@Controller
public class CustomerController {
   private CustomerService customerService=null;

   @AutoWired
   public CustomerController(CustomerService customerService){
       this.customerService=customerService;
   }

   public void save(){
       System.out.println("controller保存customer");
       customerService.save();
   }

}
3.2. @Qualifier注解
@Qualifier注解:用于指定注入的对象名,使用@Autowired注入对象时,@Autowired没有指定对象名的属性,只能通过@Qualifier字段容器中对象名,必须搭配@Autowired注解使用
属性 value:指定注入Spring容器中对应对象名的对象给引用。
@Controller
public class CustomerController {

   @Autowired
   @Qualifier(value = "customerService")		//@Qualifier不能单独使用,配合Autowired使用
   private CustomerService customerService;

   public void save(){
       System.out.println("controller保存customer");
       customerService.save();
   }

}
3.3. @Resource注解
@Resource注解是Spring框架支持Sun官方制定的JSR-250标准注入对象的实现。
JSR-250就是Sun公司制定,对注入的对象的标准。
@Resource 功能等同 @Autowired + @Qualifier ,等同配置文件标签
@Resource注解:用于给引用注入容器的对象,可以通过name属性指定对象名
注意事项:@Resource只能注入方法和属性,不能注入构造方法
@Controller
public class CustomerController {

   @Resource(name = "customerService")
   private CustomerService customerService;


   public void save(){
       System.out.println("controller保存customer");
       customerService.save();
   }

}
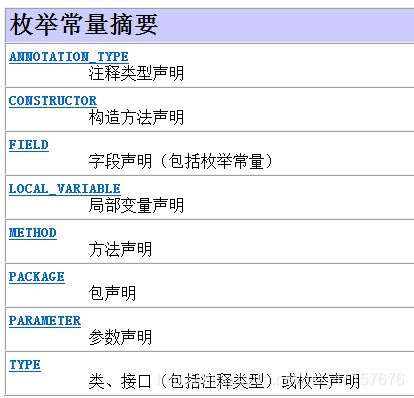
要学会通过注解声明的@Target的类型类来分析,注解可以放的位置。
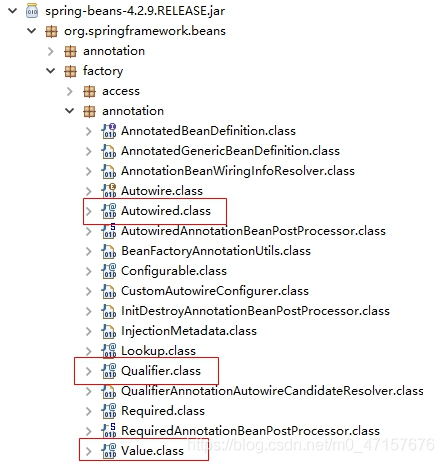
3.4. 注入注解所在的包的位置
除了@Resource注解是Java官方的标准,内置在JDK里面以外,Spring内置实现的注解声明放在spring-beans-4.2.9.RELEASE.jar里面。如下图所示:
3.5. @Value注解
value只能设置,标量类型=基础数据类型+包装类+String
@Value注解:注入基本数据类型以及它们的包装类和String类型数据的,
支持${} 注入Properties文件的键值对,等同 。
属性value:注入基本数据类型和String类型数据的
4. 示例代码-IoC实现emp操作
通过注解的方式,实现Spring框架Ioc(控制反转)的配置
注解配置和xml配置要实现的功能都是一样的,都是要降低程序间的耦合。只是配置的形式不一样。
关于实际的开发中到底使用xml还是注解,每家公司有着不同的使用习惯。所以这两种配置方式我们都需要掌握。
基于注解配置的方式已经逐渐代替xml
4.1. 第一步:创建一个spring项目
a.导入emp.sql文件到数据库
CREATE TABLE `emp` (
  `id` int(11) NOT NULL AUTO_INCREMENT,
  `name` varchar(255) DEFAULT NULL,
  `salary` double DEFAULT NULL,
  `age` int(11) DEFAULT NULL,
  PRIMARY KEY (`id`)
) ENGINE=InnoDB AUTO_INCREMENT=3 DEFAULT CHARSET=utf8;

/*Data for the table `emp` */

insert  into `emp`(`id`,`name`,`salary`,`age`) values (1,'xiaodong',1000,20),(2,'xiaobiao',500,18);
b.导入Spring框架、数据库连接要的依赖
<dependency>
    <groupId>org.springframework</groupId>
    <artifactId>spring-context</artifactId>
    <version>5.0.6.RELEASE</version>
</dependency>
<dependency>
    <groupId>mysql</groupId>
    <artifactId>mysql-connector-java</artifactId>
    <version>5.1.46</version>
</dependency>
<dependency>
    <groupId>com.alibaba</groupId>
    <artifactId>druid</artifactId>
    <version>1.1.17</version>
</dependency>

<dependency>
    <groupId>junit</groupId>
    <artifactId>junit</artifactId>
    <version>4.12</version>
</dependency>
c.编写好写好表示层、服务层、持久层的需要的类名。
目录结构如下:

d.配置db.properties配置文件
#mysql
driverClassName=com.mysql.jdbc.Driver
url=jdbc:mysql:///spring
user=root
password=admin
4.2. 第二步:配置spring配置文件
<?xml version="1.0" encoding="UTF-8"?>
<beans xmlns="http://www.springframework.org/schema/beans"
       xmlns:xsi="http://www.w3.org/2001/XMLSchema-instance"
       xmlns:context="http://www.springframework.org/schema/context"
       xsi:schemaLocation="http://www.springframework.org/schema/beans
       http://www.springframework.org/schema/beans/spring-beans.xsd
       http://www.springframework.org/schema/context
       http://www.springframework.org/schema/context/spring-context.xsd">

    <context:property-placeholder location="classpath:db.properties" />
    <context:component-scan base-package="com.dfbz" />

</beans>
实体类:
public class Emp {
    private Integer id;
    private String name;
    private Double salary;
    private Integer age;
}
工具类:
package com.dfbz.utils;

import com.alibaba.druid.pool.DruidDataSource;
import org.springframework.beans.factory.annotation.Value;
import org.springframework.stereotype.Component;

import javax.sql.DataSource;
import java.sql.Connection;
import java.sql.SQLException;

@Component
public class DBUtils {

    @Value("${driverClassName}")
    private String driver;
    @Value("${url}")
    private String url;
    @Value("${user}")
    private String username;
    @Value("${password}")
    private String password;


    public DataSource getDataSource(){
        DruidDataSource dataSource = new DruidDataSource();
        dataSource.setUsername(username);
        dataSource.setDriverClassName(driver);
        dataSource.setUrl(url);
        dataSource.setPassword(password);
        return dataSource;
    }

    public Connection getConnection(){
        try {
            return this.getDataSource().getConnection();
        } catch (SQLException e) {
            e.printStackTrace();
        }
        return null;
    }

    public void close(Connection conn){
        if (conn!=null){
            try {
                if(!conn.isClosed()){
                    conn.close();
                }
            } catch (SQLException e) {
                e.printStackTrace();
            }
        }
    }
}
4.3. 第三步:编写业务内容
dao:
package com.dfbz.dao;

import com.dfbz.entity.Emp;
import com.dfbz.utils.DBUtils;
import org.springframework.stereotype.Repository;

import javax.annotation.Resource;
import java.sql.Connection;
import java.sql.PreparedStatement;

@Repository
public class EmpDao {
   @Resource
   DBUtils dbUtils;

   public void save(Emp emp) {
       try {
           Connection conn = dbUtils.getConnection();
           PreparedStatement prep = conn.prepareStatement("insert into emp values (null,?,?,?)");
           prep.setObject(1,emp.getName());
           prep.setObject(2,emp.getSalary());
           prep.setObject(3,emp.getAge());

           prep.executeUpdate();
       }catch (Exception e){
           e.printStackTrace();
       }

   }

}
Service
package com.dfbz.service;

import com.dfbz.dao.EmpDao;
import com.dfbz.entity.Emp;
import org.springframework.stereotype.Service;

import javax.annotation.Resource;

@Service
public class EmpService {
    @Resource
    private EmpDao empDao;

    public void save(Emp emp){
        empDao.save(emp);
    }

}
controller:
package com.dfbz.controller;

import com.dfbz.entity.Emp;
import com.dfbz.service.EmpService;
import org.springframework.stereotype.Controller;

import javax.annotation.Resource;

@Controller
public class EmpController {
    @Resource
    private EmpService empService;

    public void save(Emp emp){

        empService.save(emp);

        System.out.println("保存成功!");

    }
}
测试:
package com.itdfbz.spring;

import com.dfbz.controller.EmpController;
import com.dfbz.entity.Emp;
import org.junit.Test;
import org.springframework.context.support.ClassPathXmlApplicationContext;

public class Demo1 {
    @Test
    public void getConnection(){
        ClassPathXmlApplicationContext
                context = new ClassPathXmlApplicationContext("application.xml");

        EmpController empController = context.getBean(EmpController.class);

        Emp emp=new Emp();
        emp.setName("小准");
        emp.setAge(20);
        emp.setSalary(3000D);
        empController.save(emp);

    }
}
tips:当出现两个相同名称实例,spring会覆盖其中一个,xml优先级高于注解;xml中同时配置两个相同id的bean,直接校验不通过报错。
5. 用于设置Spring容器对象生命周期注解
5.1 @Scope
Spring是通过@Scope注解来指定对象的生命周期的。
5.1.1 @Scope作用和属性
作用:指定bean的作用范围。
属性:value:指定范围的值。
取值:singleton prototype request session globalsession
scope:用于设置的对象的作用范围,可选参数如下:
*singleton:单例
对象出生:当程序加载配置文件创建容器时,创建
对象活着:只要容器还在,一直活着
对象死亡:应用停止,容器销毁,对象死亡
*prototype:多例(原型对象)
对象出生:当程序加载配置文件创建容器后,getBean的时候创建
对象活着:只要对象被使用,一直活着
对象死亡:对象长时间不用,会被Java垃圾回收机制回收
*reqeust:web项目中,Spring将创建的对象放在request作用域中
*session:web项目中,Spring将创建的对象放在session作用域中
*globalSession:web项目中,应用域集群环境,如果没有集群环境相当于session
5.1.2. 示例代码–单例对象
所谓的单例对象,就是每次从Spring容器获得对象就同一个对象。
默认不加@Scope或者或者声明value=“singleton”,都是单例
组件类
@Component
@Scope(value="singleton")//默认不写,或者声明value="singleton"//都是声明当前类的对象为一个单例对象
public class HelloWorld {
    public void say(){
        System.out.println("--你好世界!--");
    }

}
–测试代码
package com.itdfbz.spring;

import com.dfbz.hello.HelloWorld;
import org.junit.Test;
import org.springframework.context.support.ClassPathXmlApplicationContext;

public class Demo1 {
    @Test
    public void getConnection(){
        ClassPathXmlApplicationContext
                context = new ClassPathXmlApplicationContext("application.xml");

        HelloWorld h1 = context.getBean(HelloWorld.class);
        HelloWorld h2 = context.getBean(HelloWorld.class);

        System.out.println(h1==h2);         //true
    }
}
5.1.3. 示例代码-获得原型对象
所谓的原型对象,就是每次从Spring容器中获得的对象都是重新创建的。
–组件类
@Component
//声明value="prototype"//就是当前类的对象是一个原型对象
@Scope(value="prototype")
public class HelloWorld {
    public void say(){
        System.out.println("--你好世界!--");
    }

}
5.2. 和生命周期相关的注解(了解)
@PostConstruct注解
等同于
作用:用于指定初始化方法。
@PreDestroy注解
等同于
作用:用于指定销毁方法。
示例代码
–组件类
package com.dfbz.hello;

import org.springframework.stereotype.Component;

import javax.annotation.PostConstruct;
import javax.annotation.PreDestroy;

@Component
public class HelloWorld {

    public void sayHello(){

        System.out.println("HelloWorld");
    }

    //对象初始方法
    @PostConstruct
    public void init(){
        System.out.println("HelloWorld初始化了");
    }

    //对象注销前,必须调用该方法
    @PreDestroy
    public void destroy(){
        System.out.println("HelloWorld销毁了");
    }
}
–测试代码
package com.itdfbz.spring;

import com.dfbz.hello.HelloWorld;
import org.junit.Test;
import org.springframework.context.support.ClassPathXmlApplicationContext;

public class Demo1 {
    @Test
    public void getConnection(){
        ClassPathXmlApplicationContext
                context = new ClassPathXmlApplicationContext("application.xml");

        HelloWorld h1 = context.getBean(HelloWorld.class);

        context.close();        //销毁容器
    }
}
6.总结
- 学习基于注解的IoC配置,大家脑海里首先得有一个认知,即注解配置和xml配置要实现的功能都是一样的,都是要降低程序间的耦合。只是配置的形式不一样。
- 关于实际的开发中到底使用xml还是注解,每家公司有着不同的使用习惯。所以这两种配置方式我们都需要掌握。
- XML配置文件,非编程语言语法,所以无法调试。使用注解配置的代码,更加容易定位问题
- 基于注解配置的方式也已经逐渐代替xml
三. 纯注解配置
3.1. 待改造的问题
我们发现,之所以我们现在离不开xml配置文件,是因为我们有一句很关键的配置:
<!-- 告知spring框架在,读取配置文件,创建容器时,扫描注解,依据注解创建对象,并存入容器中 -->
<context:component-scan base-package="com.dfbz" />
如果他要也能用注解配置,那么我们就可以脱离xml文件了。
通过@Configuration注解和@ComponentScan注解
| 替换XML配置文件的@Configuration注解 | @Configuration配置类注解,在纯注解配置中,类加了该注解,就意味着该类是Spring的配置类。该类的功能就是用于替代原来的XML配置文件。 作用:用于指定当前类是一个spring配置类,当创建容器时会从该类上加载注解。获取容器时需要使用AnnotationConfigApplicationContext(有@Configuration注解的类.class)。 |
|---|---|
| @ComponentScan注解 | @ComponentScan注解扫描类,作用就是配置扫描Spring组件类的路径。功能等同原来配置文件的 –作用:用于指定spring在初始化容器时要扫描的包。作用和在spring的xml配置文件中的:<context:component-scan base-package=“com”/>是一样的。–属性:basePackages:用于指定要扫描的包。和该注解中的value属性作用一样。 |
| @PropertySource注解 | 作用:用于加载.properties文件中的配置。例如我们配置数据源时,可以把连接数据库的信息写到properties配置文件中,就可以使用此注解指定properties配置文件的位置。属性:value[]:用于指定properties文件位置。如果是在类路径下,需要写上classpath:encoding:用于指定文件编码 |
| @Bean注解 | 作用:该注解只能写在方法上,使用此方法创建一个对象,并且放入spring容器。它就相当于我们之前在xml配置中介绍的<bean标签> 属性:name:给当前@Bean注解方法创建的对象指定一个名称(即bean的id)。 |
| @Import注解 | 作用:用于导入其他配置类,在引入其他配置类时,可以不用再写@Configuration注解。当然,写上也没问题。 属性:value[]:用于指定其他配置类的字节码。 |
3.2. 示例代码
3.2.1. 说明
需求:通过一个示例,实现创建一个配置类使用@Configuration注解和@ComponentScan注解替换xml文件。
3.2.2 第一步:创建一个spring项目
创建一个项目,导入必须的jar包以及编写好需要的类结构。代码目录如下:

3.2.3.第二步:编写properties
–配置文件customer.properties代码
id=1
name=小标
password=admin
3.2.4.第三步:编写配置类代码
–通过该配置类的代码替换掉Spring配置文件
package com.dfbz.config;

import org.springframework.context.annotation.ComponentScan;
import org.springframework.context.annotation.Configuration;
import org.springframework.context.annotation.PropertySource;

//1.使用@Configuration声明该类为一个Spring配置类
@Configuration
//2.使用@ComponentScan指定扫描的包路径
@ComponentScan(basePackages="com.dfbz")
//3.使用PropertySource指定掃描配置文件
@PropertySource({"customer.properties"})
public class Application {
}
第四步:编写customer
package com.dfbz.entity;
import org.springframework.beans.factory.annotation.Value;
import org.springframework.stereotype.Component;
@Component
public class Customer {
@Value("${id}")
private Integer id;
@Value("${name}")
private String name;
@Value("${password}")
private String password;
public void show(){
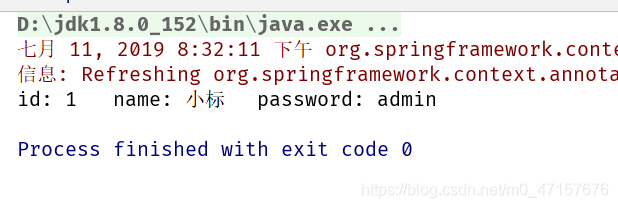
System.out.println("id: "+id+"\tname: "+name+"\tpassword: "+password);
}
}
第五步:编写测试代码
package com.itdfbz.spring;

import com.dfbz.config.Application;
import com.dfbz.entity.Customer;
import org.junit.Test;
import org.springframework.context.annotation.AnnotationConfigApplicationContext;

public class Demo1 {
    @Test
    public void getConnection(){

        //注意:读取注解配置类的容器类为AnnotationConfigApplicationContext
        AnnotationConfigApplicationContext
                app = new AnnotationConfigApplicationContext(Application.class);

        Customer customer = app.getBean(Customer.class);
        customer.show();

    }
}
结果:
四. Spring整合Junit
在测试类中,每个测试方法都有以下两行代码:
ApplicationContext ac = **new **ClassPathXmlApplicationContext(“application.xml”);
CustomerService as = ac.getBean(CustomerService .class);
这两行代码的作用是获取容器,比较繁琐,如何解决?
针对上述问题,我们需要的是程序能自动帮我们创建容器。一旦程序能自动为我们创建 spring 容器,我们就无须手动创建了,问题也就解决了。
我们都知道, junit 单元测试的原理
但显然, junit 是无法实现的,因为它自己都无法知晓我们是否使用了 spring 框架,更不用说帮我们创建 spring 容器了。
不过好在, junit 给我们暴露了一个注解,可以让我们替换掉它的运行器。这时,我们需要依靠 spring 框架,因为它提供了一个运行器,可以读取配置文件(或注解)来创建容器。
4.1. 测试基于XML的配置
4.1.1. 第一步:创建项目引入依赖
<!-- spring整合junit包 -->
<dependency>
    <groupId>org.springframework</groupId>
    <artifactId>spring-test</artifactId>
    <version>5.0.6.RELEASE</version>
</dependency>
4.1.2. 第二步,编写一个简单的Customer 类
package com.dfbz.entity;

public class Customer {
    private Integer id;

    private String name;

    private String password;

    public Integer getId() {
        return id;
    }

    public void setId(Integer id) {
        this.id = id;
    }

    public String getName() {
        return name;
    }

    public void setName(String name) {
        this.name = name;
    }

    public String getPassword() {
        return password;
    }

    public void setPassword(String password) {
        this.password = password;
    }

    public void show(){
        System.out.println("id: "+id+"\tname: "+name+"\tpassword: "+password);
    }
}
4.1.3. 第三步:编写Spring配置文件
<?xml version="1.0" encoding="UTF-8"?>
<beans xmlns="http://www.springframework.org/schema/beans"
       xmlns:xsi="http://www.w3.org/2001/XMLSchema-instance"
       xsi:schemaLocation="http://www.springframework.org/schema/beans http://www.springframework.org/schema/beans/spring-beans.xsd">

    <bean id="customer" class="com.dfbz.entity.Customer">
        <property name="id" value="1" />
        <property name="name" value="东方标准" />
        <property name="password" value="admin" />
    </bean>
</beans>
4.1.4. 第四步:Junit测试
package com.itdfbz.spring;

import com.dfbz.entity.Customer;
import org.junit.Test;
import org.junit.runner.RunWith;
import org.springframework.beans.factory.annotation.Autowired;
import org.springframework.test.context.ContextConfiguration;
import org.springframework.test.context.junit4.SpringJUnit4ClassRunner;


//指定Junit之前测试之前,加入Spring框架启动的逻辑代码
@RunWith(SpringJUnit4ClassRunner.class)
//指定Spring启动必须的配置文件
//注意:配置文件通过locations指定
@ContextConfiguration(locations="classpath:application.xml")
public class Demo1 {

    @Autowired
    private Customer customer;
    @Test
    public void getConnection(){
        customer.show();
    }
}
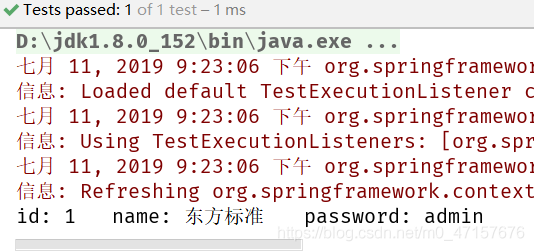
–测试结果

4.2. 测试基于纯注解的配置
–就是通过spring-test-5.0.6.RELEASE.jar,对纯注解配置的Spring项目进行单元测试。
4.2.1. 第一步:创建一个项目并添加依赖
<dependency>
    <groupId>org.springframework</groupId>
    <artifactId>spring-test</artifactId>
    <version>5.0.6.RELEASE</version>
</dependency>
4.2.2 第二步:编写一个简单的组件类
package com.dfbz.entity;

import org.springframework.beans.factory.annotation.Value;
import org.springframework.stereotype.Component;

@Component
public class Customer {
    @Value("1")
    private Integer id;

    @Value("东方标准")
    private String name;

    @Value("admin")
    private String password;

    public Integer getId() {
        return id;
    }

    public void setId(Integer id) {
        this.id = id;
    }

    public String getName() {
        return name;
    }

    public void setName(String name) {
        this.name = name;
    }

    public String getPassword() {
        return password;
    }

    public void setPassword(String password) {
        this.password = password;
    }

    public void show(){
        System.out.println("id: "+id+"\tname: "+name+"\tpassword: "+password);
    }
}
4.2.3 第三步:编写一个配置类
package com.dfbz.config;

import org.springframework.context.annotation.ComponentScan;
import org.springframework.context.annotation.Configuration;

//标注该类是一个spring配置类
@Configuration
@ComponentScan(basePackages="com.dfbz")			//扫描表
public class Application {
}
4.2.4. 第四步:使用Junit测试
package com.itdfbz.spring;

import com.dfbz.config.Application;
import com.dfbz.entity.Customer;
import org.junit.runner.RunWith;
import org.springframework.beans.factory.annotation.Autowired;
import org.springframework.test.context.ContextConfiguration;
import org.springframework.test.context.junit4.SpringJUnit4ClassRunner;
//指定Junit之前测试之前,加入Spring框架启动的逻辑代码
@RunWith(SpringJUnit4ClassRunner.class)
@ContextConfiguration(classes = Application.class)          //传入主配置类字节码对象
public class Demo1 {

    @Autowired
    private Customer customer;

    public void test1(){
        customer.show();
    }
}
–测试结果
五. Spring搭建开发环境(JdbcTemplate)
1. 纯XML配置方式
1.1 创建Maven项目
1.1.1 引入Maven依赖
<dependency>
    <groupId>org.springframework</groupId>
    <artifactId>spring-context</artifactId>
    <version>5.0.6.RELEASE</version>
</dependency>

<!--spring对jdcb支持包 JdbcTemplate-->
<dependency>
    <groupId>org.springframework</groupId>
    <artifactId>spring-jdbc</artifactId>
    <version>5.0.6.RELEASE</version>
</dependency>

<dependency>
    <groupId>mysql</groupId>
    <artifactId>mysql-connector-java</artifactId>
    <version>5.1.47</version>
</dependency>

<dependency>
    <groupId>com.alibaba</groupId>
    <artifactId>druid</artifactId>
    <version>1.1.17</version>
</dependency>

<dependency>
    <groupId>junit</groupId>
    <artifactId>junit</artifactId>
    <version>4.12</version>
</dependency>

<!--spring整合junit包-->
<dependency>
    <groupId>org.springframework</groupId>
    <artifactId>spring-test</artifactId>
    <version>5.0.6.RELEASE</version>
</dependency>
1.1.2 entity
package com.dfbz.entity;

public class Emp {
    private Integer id;
    private String name;
    private Double salary;
    private Integer age;


    public Integer getId() {
        return id;
    }

    public void setId(Integer id) {
        this.id = id;
    }

    public String getName() {
        return name;
    }

    public void setName(String name) {
        this.name = name;
    }

    public Double getSalary() {
        return salary;
    }

    public void setSalary(Double salary) {
        this.salary = salary;
    }

    public Integer getAge() {
        return age;
    }

    public void setAge(Integer age) {
        this.age = age;
    }

    @Override
    public String toString() {
        return "Emp{" +
                "id=" + id +
                ", name='" + name + '\'' +
                ", salary=" + salary +
                ", age=" + age +
                '}';
    }
}
1.1.3 db.properties
jdbc.user=root
jdbc.password=admin
jdbc.url=jdbc:mysql:///spring?characterEncoding=utf8
jdbc.driver=com.mysql.jdbc.Driver
1.2 编写dao
package com.dfbz.dao;

import com.dfbz.entity.Emp;
import org.springframework.jdbc.core.BeanPropertyRowMapper;
import org.springframework.jdbc.core.JdbcTemplate;

import java.util.List;

public class EmpDao {

    private JdbcTemplate jdbcTemplate;

    //提供set方法用于spring属性注入jdbcTemplate
    public void setJdbcTemplate(JdbcTemplate jdbcTemplate) {
        this.jdbcTemplate = jdbcTemplate;
    }

    public void save(Emp emp){
        jdbcTemplate.update("insert into emp values(null,?,?,?) ",
                emp.getName(),emp.getSalary(),emp.getAge());

    }

    public void delete(Integer id){

        jdbcTemplate.update("delete from emp where id=? ",id);
    }
    public void update(Emp emp){
        jdbcTemplate.update("update emp set name=?,salary=?,age=? where id=?",
                emp.getName(),
                emp.getSalary(),
                emp.getAge(),
                emp.getId()
                );

    }
    public Emp findById(Integer id){
        Emp emp = jdbcTemplate.queryForObject("select * from emp where id=?",
                new BeanPropertyRowMapper<>(Emp.class), id);
        return emp;

    }
    public List<Emp> findAll(){
        List<Emp> empList = jdbcTemplate.query("select * from emp", new BeanPropertyRowMapper<>(Emp.class));
        return empList;

    }
}
1.3 编写service
package com.dfbz.service;

import com.dfbz.dao.EmpDao;
import com.dfbz.entity.Emp;

import java.util.List;

public class EmpService {

    private EmpDao empDao;

    //提供set方法用于spring属性注入empDao
    public void setEmpDao(EmpDao empDao) {
        this.empDao = empDao;
    }

    public void save(Emp emp){
        empDao.save(emp);
    }

    public void delete(Integer id){

        empDao.delete(id);
    }
    public void update(Emp emp){

        empDao.update(emp);
    }
    public Emp findById(Integer id){

        return empDao.findById(id);
    }
    public List<Emp> findAll(){

        return empDao.findAll();

    }
}
1.4 编写controller
package com.dfbz.controller;

import com.dfbz.entity.Emp;
import com.dfbz.service.EmpService;

import java.util.List;

public class EmpController {

    private EmpService empService;

    //提供set方法用于spring属性注入empService
    public void setEmpService(EmpService empService) {
        this.empService = empService;
    }

    public void save(Emp emp) {
        empService.save(emp);
    }

    public void delete(Integer id) {

        empService.delete(id);
    }

    public void update(Emp emp) {

        empService.update(emp);
    }

    public Emp findById(Integer id) {

        return empService.findById(id);
    }

    public List<Emp> findAll() {

        return empService.findAll();

    }
}
1.5 编写Spirng配置文件
<?xml version="1.0" encoding="UTF-8"?>
<beans xmlns="http://www.springframework.org/schema/beans"
       xmlns:xsi="http://www.w3.org/2001/XMLSchema-instance"
       xmlns:context="http://www.springframework.org/schema/context"
       xsi:schemaLocation="http://www.springframework.org/schema/beans http://www.springframework.org/schema/beans/spring-beans.xsd http://www.springframework.org/schema/context http://www.springframework.org/schema/context/spring-context.xsd">

    <!--加载db配置文件-->
    <context:property-placeholder location="classpath:db.properties" />

    <!--创建数据源-->
    <bean id="dataSource" class="com.alibaba.druid.pool.DruidDataSource">
        <property name="username" value="${jdbc.user}"></property>
        <property name="password" value="${jdbc.password}"></property>
        <property name="url" value="${jdbc.url}"></property>
        <property name="driverClassName" value="${jdbc.driver}"></property>
    </bean>

    <!--创建jdbcTemplate并指定数据源-->
    <bean id="jdbcTemplate" class="org.springframework.jdbc.core.JdbcTemplate">
        <property name="dataSource" ref="dataSource" />
    </bean>

    <!--创建dao并注入JdbcTemplate-->
    <bean id="empDao" class="com.dfbz.dao.EmpDao">
        <property name="jdbcTemplate" ref="jdbcTemplate" />
    </bean>

    <!--创建service并注入dao-->
    <bean id="empService" class="com.dfbz.service.EmpService">
        <property name="empDao" ref="empDao" />
    </bean>

    <!--创建controller并注入service-->
    <bean id="empController" class="com.dfbz.controller.EmpController">
        <property name="empService" ref="empService" />
    </bean>

</beans>
1.6 测试
package com.dfbz.spring;

import com.dfbz.controller.EmpController;
import com.dfbz.entity.Emp;
import org.junit.Test;
import org.junit.runner.RunWith;
import org.springframework.beans.factory.annotation.Autowired;
import org.springframework.test.context.ContextConfiguration;
import org.springframework.test.context.junit4.SpringRunner;


//@RunWith(SpringJUnit4ClassRunner.class)
@RunWith(SpringRunner.class)
@ContextConfiguration("classpath:application.xml")
public class Demo1 {

    @Autowired
    private EmpController empController;

    @Test
    public void test1(){

        Emp emp = empController.findById(1);
        System.out.println(emp);
    }

}
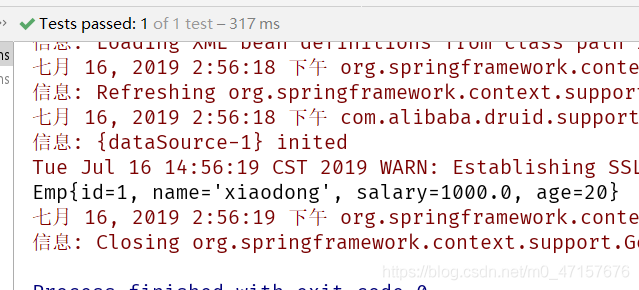
结果:
2. 纯注解配置
1.1 核心配置类
package com.dfbz.config;

import com.alibaba.druid.pool.DruidDataSource;
import com.dfbz.controller.EmpController;
import com.dfbz.entity.Emp;
import org.springframework.beans.factory.annotation.Value;
import org.springframework.context.annotation.Bean;
import org.springframework.context.annotation.ComponentScan;
import org.springframework.context.annotation.Configuration;
import org.springframework.context.annotation.PropertySource;
import org.springframework.jdbc.core.JdbcTemplate;

import javax.sql.DataSource;        //

@Configuration          //用于标注该类是spring的核心配置类
@ComponentScan("com.dfbz")      //扫描com.dfbz下的子孙包
@PropertySource("classpath:db.properties")      //加载properties配置文件
public class Application {

    @Value("${jdbc.user}")              // 使用OGNL表达式获取properties配置文件中的数据
    private String username;

    @Value("${jdbc.password}")
    private String password;

    @Value("${jdbc.url}")
    private String url;

    @Value("${jdbc.driver}")
    private String driverClass;

    @Bean           //把方法返回值:DataSource注入到spring容器里面
    public DataSource getDataSource(){
        DruidDataSource dataSource=new DruidDataSource();
        dataSource.setUsername(username);
        dataSource.setPassword(password);
        dataSource.setUrl(url);
        dataSource.setDriverClassName(driverClass);

        return dataSource;
    }

    /**
     * 把方法返回值JdbcTemplate注入到spring容器里面
     *  该方法由spring调用,调用时传入容器中的datasource对象
     * @param dataSource
     * @return
     */
    @Bean
    public JdbcTemplate getJdbcTemplate(DataSource dataSource){
        JdbcTemplate template=new JdbcTemplate(dataSource);
        return template;
    }

}
1.2 dao
package com.dfbz.dao;

import com.dfbz.entity.Emp;
import org.springframework.beans.factory.annotation.Autowired;
import org.springframework.jdbc.core.BeanPropertyRowMapper;
import org.springframework.jdbc.core.JdbcTemplate;
import org.springframework.stereotype.Repository;

import java.util.List;

@Repository         //使用注解把EmpDao注入到IOC容器
public class EmpDao {

    @Autowired      //从IOC容器中取出jdbcTemplate
    private JdbcTemplate jdbcTemplate;

    public void save(Emp emp){
        jdbcTemplate.update("insert into emp values(null,?,?,?) ",
                emp.getName(),emp.getSalary(),emp.getAge());

    }

    public void delete(Integer id){

        jdbcTemplate.update("delete from emp where id=? ",id);
    }
    public void update(Emp emp){
        jdbcTemplate.update("update emp set name=?,salary=?,age=? where id=?",
                emp.getName(),
                emp.getSalary(),
                emp.getAge(),
                emp.getId()
                );

    }
    public Emp findById(Integer id){
        Emp emp = jdbcTemplate.queryForObject("select * from emp where id=?",
                new BeanPropertyRowMapper<>(Emp.class), id);
        return emp;

    }
    public List<Emp> findAll(){
        List<Emp> empList = jdbcTemplate.query("select * from emp", new BeanPropertyRowMapper<>(Emp.class));
        return empList;

    }

}
1.3 service
package com.dfbz.service;

import com.dfbz.dao.EmpDao;
import com.dfbz.entity.Emp;
import org.springframework.beans.factory.annotation.Autowired;
import org.springframework.stereotype.Service;

import java.util.List;

@Service            //将EmpService注入到IOC容器中
public class EmpService {

    @Autowired      //从IOC容器中取出empDao
    private EmpDao empDao;

    public void save(Emp emp){
        empDao.save(emp);
    }

    public void delete(Integer id){

        empDao.delete(id);
    }
    public void update(Emp emp){

        empDao.update(emp);
    }
    public Emp findById(Integer id){

        return empDao.findById(id);
    }
    public List<Emp> findAll(){

        return empDao.findAll();

    }

}
1.4 controller
package com.dfbz.controller;

import com.dfbz.entity.Emp;
import com.dfbz.service.EmpService;
import org.springframework.beans.factory.annotation.Autowired;
import org.springframework.stereotype.Controller;

import java.util.List;

@Controller         //将EmpController注入到IOC容器中
public class EmpController {

    @Autowired          //从IOC容器中取出empService
    private EmpService empService;

    public void save(Emp emp) {
        empService.save(emp);
    }

    public void delete(Integer id) {

        empService.delete(id);
    }

    public void update(Emp emp) {

        empService.update(emp);
    }

    public Emp findById(Integer id) {
        return empService.findById(id);
    }

    public List<Emp> findAll() {
        return empService.findAll();
    }
}
1.5 测试
package com.dfbz.spring;

import com.dfbz.config.Application;
import com.dfbz.controller.EmpController;
import com.dfbz.entity.Emp;
import org.junit.Test;
import org.junit.runner.RunWith;
import org.springframework.beans.factory.annotation.Autowired;
import org.springframework.test.context.ContextConfiguration;
import org.springframework.test.context.junit4.SpringRunner;

@RunWith(SpringRunner.class)
@ContextConfiguration(classes = Application.class)          //传入核心配置类字节码对象
public class Demo2 {

    @Autowired
    private EmpController empController;

    @Test
    public void test1(){

        Emp emp = empController.findById(1);

        System.out.println(emp);
    }

}
update(Emp emp){
    empDao.update(emp);
}
public Emp findById(Integer id){

    return empDao.findById(id);
}
public List<Emp> findAll(){

    return empDao.findAll();

}
### 1.4 controller

```java
package com.dfbz.controller;

import com.dfbz.entity.Emp;
import com.dfbz.service.EmpService;
import org.springframework.beans.factory.annotation.Autowired;
import org.springframework.stereotype.Controller;

import java.util.List;

@Controller         //将EmpController注入到IOC容器中
public class EmpController {

    @Autowired          //从IOC容器中取出empService
    private EmpService empService;

    public void save(Emp emp) {
        empService.save(emp);
    }

    public void delete(Integer id) {

        empService.delete(id);
    }

    public void update(Emp emp) {

        empService.update(emp);
    }

    public Emp findById(Integer id) {
        return empService.findById(id);
    }

    public List<Emp> findAll() {
        return empService.findAll();
    }
}
1.5 测试
package com.dfbz.spring;

import com.dfbz.config.Application;
import com.dfbz.controller.EmpController;
import com.dfbz.entity.Emp;
import org.junit.Test;
import org.junit.runner.RunWith;
import org.springframework.beans.factory.annotation.Autowired;
import org.springframework.test.context.ContextConfiguration;
import org.springframework.test.context.junit4.SpringRunner;

@RunWith(SpringRunner.class)
@ContextConfiguration(classes = Application.class)          //传入核心配置类字节码对象
public class Demo2 {

    @Autowired
    private EmpController empController;

    @Test
    public void test1(){

        Emp emp = empController.findById(1);

        System.out.println(emp);
    }

}