码农code之路
前后端分离开发,后端需要编写接⼝说明⽂档,会耗费⽐较多的时间。
swagger 是⼀个⽤于⽣成服务器接⼝的规范性⽂档,并且能够对接⼝进⾏测试的⼯具。
作用
- ⽣成接⼝说明⽂档
- 对接⼝进⾏测试
使用步骤
- 添加依赖
<!--swagger--> <dependency> <groupId>io.springfox</groupId> <artifactId>springfox-swagger2</artifactId> <version>2.9.2</version> </dependency> <dependency> <groupId>io.springfox</groupId> <artifactId>springfox-swagger-ui</artifactId> <version>2.9.2</version> </dependency> - 写配置类
SwaggerConfig/** * SwaggerConfig 接口文档配置类 */ @Configuration @EnableSwagger2 public class SwaggerConfig { /** * 配置接口文档生成规则 */ @Bean public Docket getDocket() { // 设置文档生成规则 return new Docket(DocumentationType.SWAGGER_2) .apiInfo(apiInfo()) // 设置文档信息 .select() // 设置哪个包下的类需要生成文档 .apis(RequestHandlerSelectors.basePackage("com.luis.fmmall.controller")) .paths(PathSelectors.any()) // 定义哪些路径的接口需要生成文档 .build(); } /** * 设置文档信息 */ private ApiInfo apiInfo() { return new ApiInfoBuilder() .title("xxx接口文档") .description("这里是相关描述") .version("1.0") .contact(new Contact("luis", "https://www.cnblogs.com/luisblog", "xxx@qq.com")) .build(); } } - 在控制器类上使用 Swagger 的注解进行相关说明示例如下:
@RestController @RequestMapping("/user") @Api(tags = "用户管理", value = "提供用户的登陆、注册、修改等功能") //类说明 public class UserController { @Resource private UserService userService; @GetMapping("/login") @ApiOperation(value = "登陆验证", notes = "用户登陆检查") //方法名说明 @ApiImplicitParams({ //参数说明 @ApiImplicitParam(dataType = "string", name = "username", value = "用户名", required = true), @ApiImplicitParam(dataType = "string", name = "password", value = "用户密码", required = false, defaultValue = "123") }) public ResultVo login(@RequestParam("username") String name, @RequestParam(value = "password", defaultValue = "123") String pwd) { return userService.checkLogin(name, pwd); } } - 启动 SpringBoot 应用,访问
http://localhost:8080/swagger-ui.html效果如下: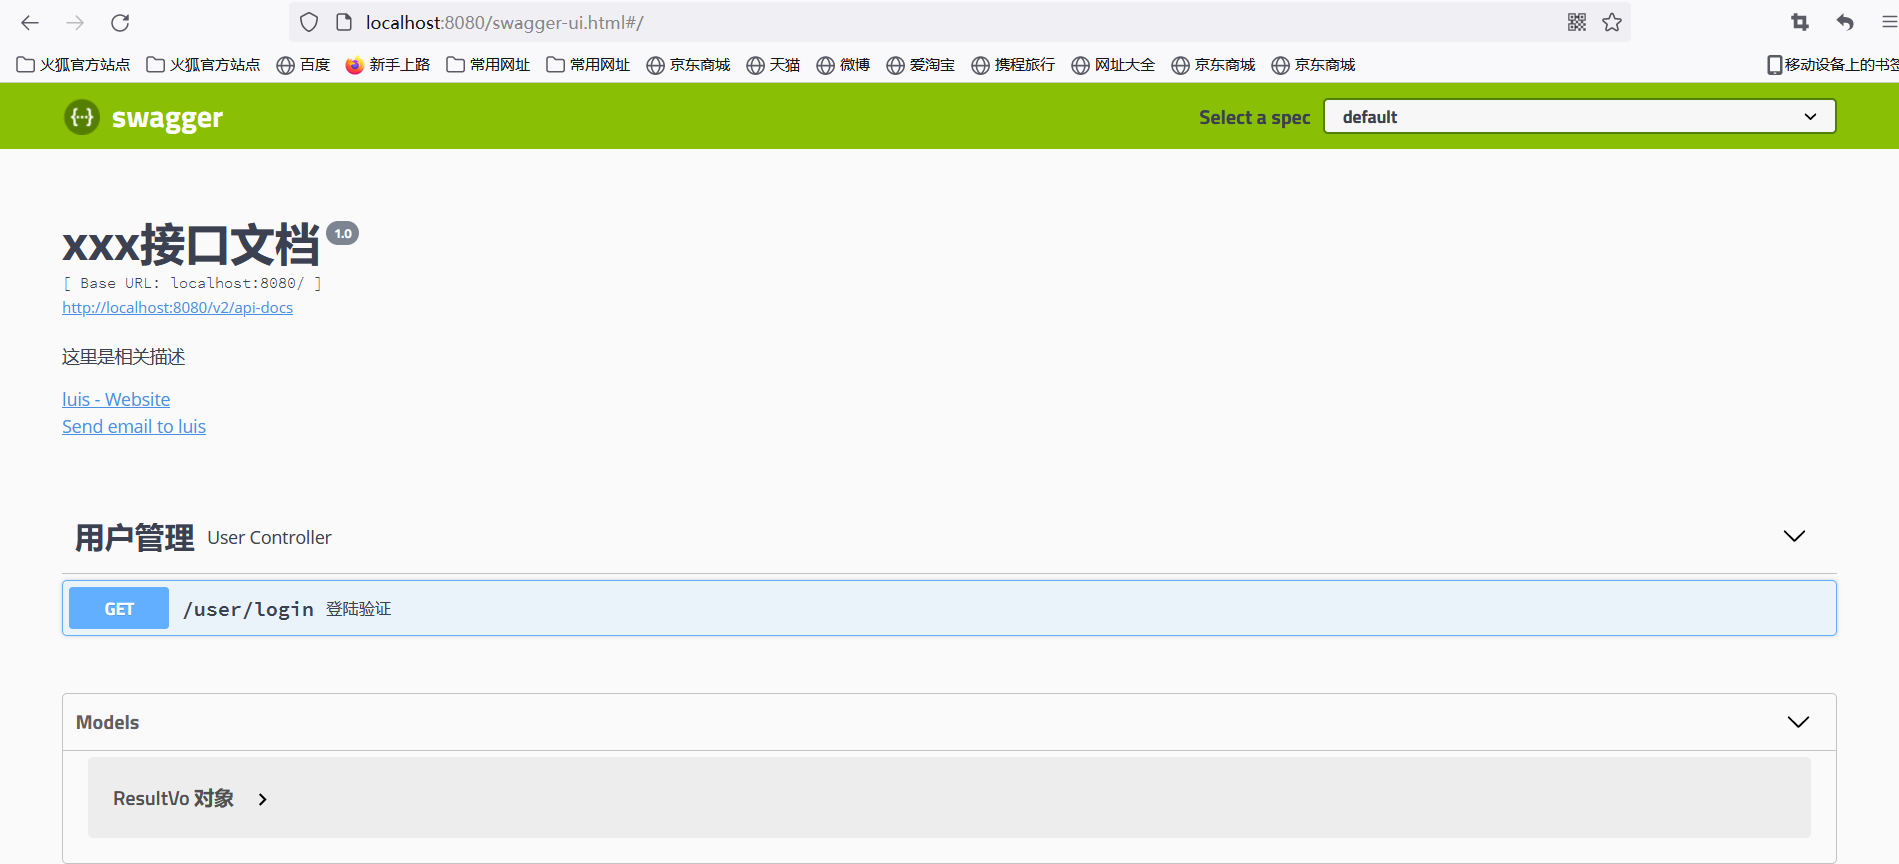

常用注解说明
@Api:类注解,使用在控制器类上,对类进行说明控制器类 UserController 示例:@Api(tags = "用户管理", value = "提供用户的登陆、注册、修改等功能") //类说明 public class UserController { }@ApiOperation:方法注解,使用在方法上,对方法名进行说明@ApiImplicitParam和@ApiImplicitParams:方法注解,使用在方法上,对方法的形参进行说明单个形参使用@ApiImplicitParam,多个形参使用@ApiImplicitParams控制器类 UserController 的 login 方法示例:
@GetMapping("/login") @ApiOperation(value = "登陆验证", notes = "用户登陆检查") //方法名说明 @ApiImplicitParams({ //参数说明 @ApiImplicitParam(dataType = "string", name = "username", value = "用户名", required = true), @ApiImplicitParam(dataType = "string", name = "password", value = "用户密码", required = false, defaultValue = "123") }) public ResultVo login(@RequestParam("username") String name, @RequestParam(value = "password", defaultValue = "123") String pwd) { return userService.checkLogin(name, pwd); }@ApiModel和@ApiModelProperty:当接⼝的形参或返回值为对象类型时,在实体类中添加此注解说明接口的返回值为 ResultVo 对象示例:@Data @NoArgsConstructor @AllArgsConstructor @ApiModel(value = "ResultVo 对象", description = "返回给前端的封装数据") //返回的类说明 public class ResultVo { // 响应给前端的状态码 @ApiModelProperty("响应状态码") //属性说明 private int code; // 响应给前端的提示信息 @ApiModelProperty("提示信息") //属性说明 private String msg; // 响应给前端的数据 @ApiModelProperty("数据") //属性说明 private Object data; }接口的形参为 User 实体对象示例:
@Data @NoArgsConstructor @AllArgsConstructor @ApiModel(value = "User 对象",description = "⽤户/买家信息") public class User { @ApiModelProperty(dataType = "int",required = false) private int userId; @ApiModelProperty(dataType = "String",required = true, value = "⽤ 户注册账号") private String userName; @ApiModelProperty(dataType = "String",required = true, value = "⽤ 户注册密码") private String userPwd; @ApiModelProperty(dataType = "String",required = true, value = "⽤ 户真实姓名") private String userRealname; @ApiModelProperty(dataType = "String",required = true, value = "⽤ 户头像url") private String userImg; }@ApiIgnore:接⼝⽅法注解,添加此注解的⽅法将不会⽣成到接⼝⽂档中
swagger-ui 插件
发现一个规律,越学到最后,越是有惊喜,有不有?
swagger-ui 插件是一款 UI 美化插件,是基于 swagger 的。
之前使用的默认 swagger 文档和调试页面如果使用起来不太顺畅,可以试试这款 swagger-ui 插件。
使用
- 添加依赖
<dependency> <groupId>com.github.xiaoymin</groupId> <artifactId>swagger-bootstrap-ui</artifactId> <version>1.9.6</version> </dependency> - 重启 SpringBoot 应用,访问
http://localhost:8080/doc.html效果如下: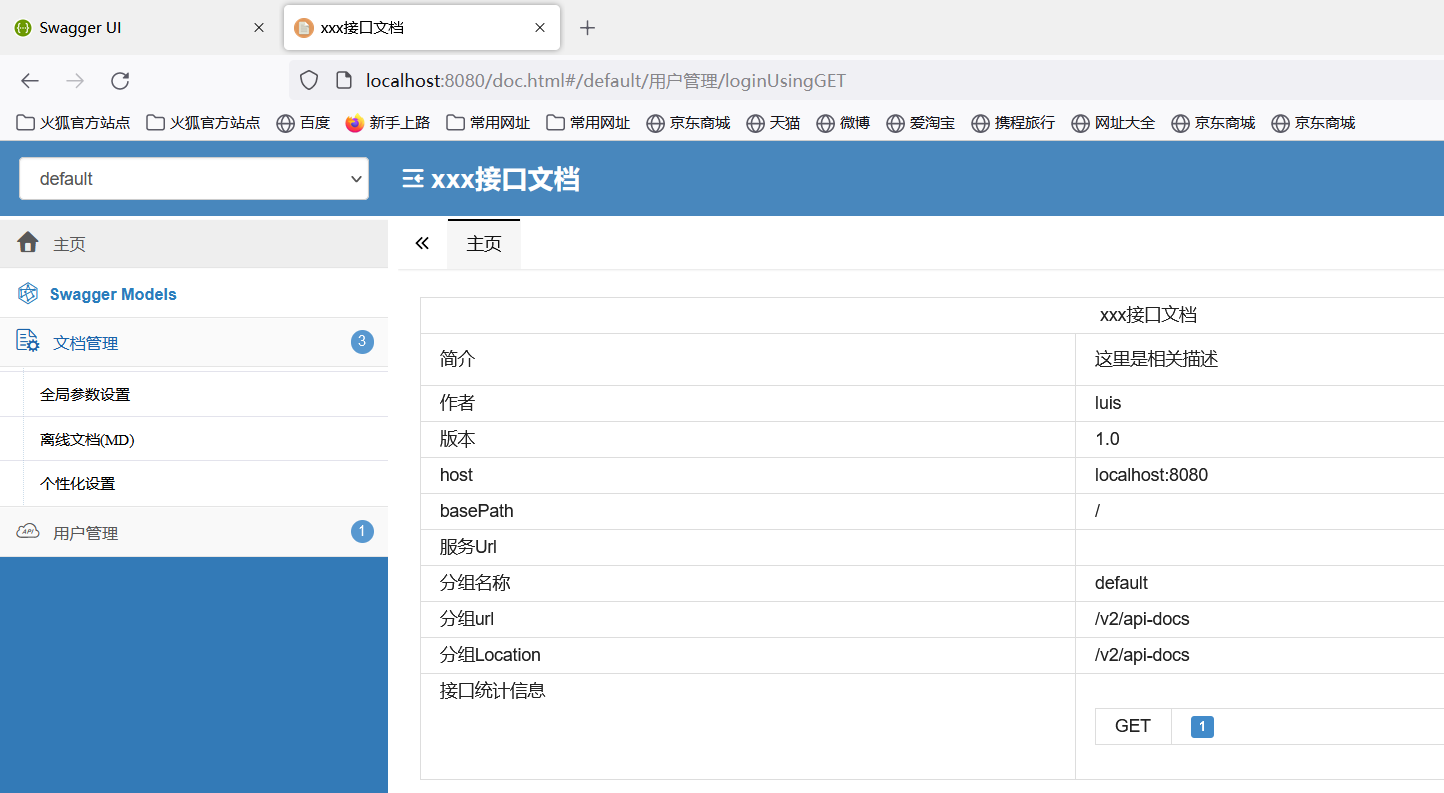

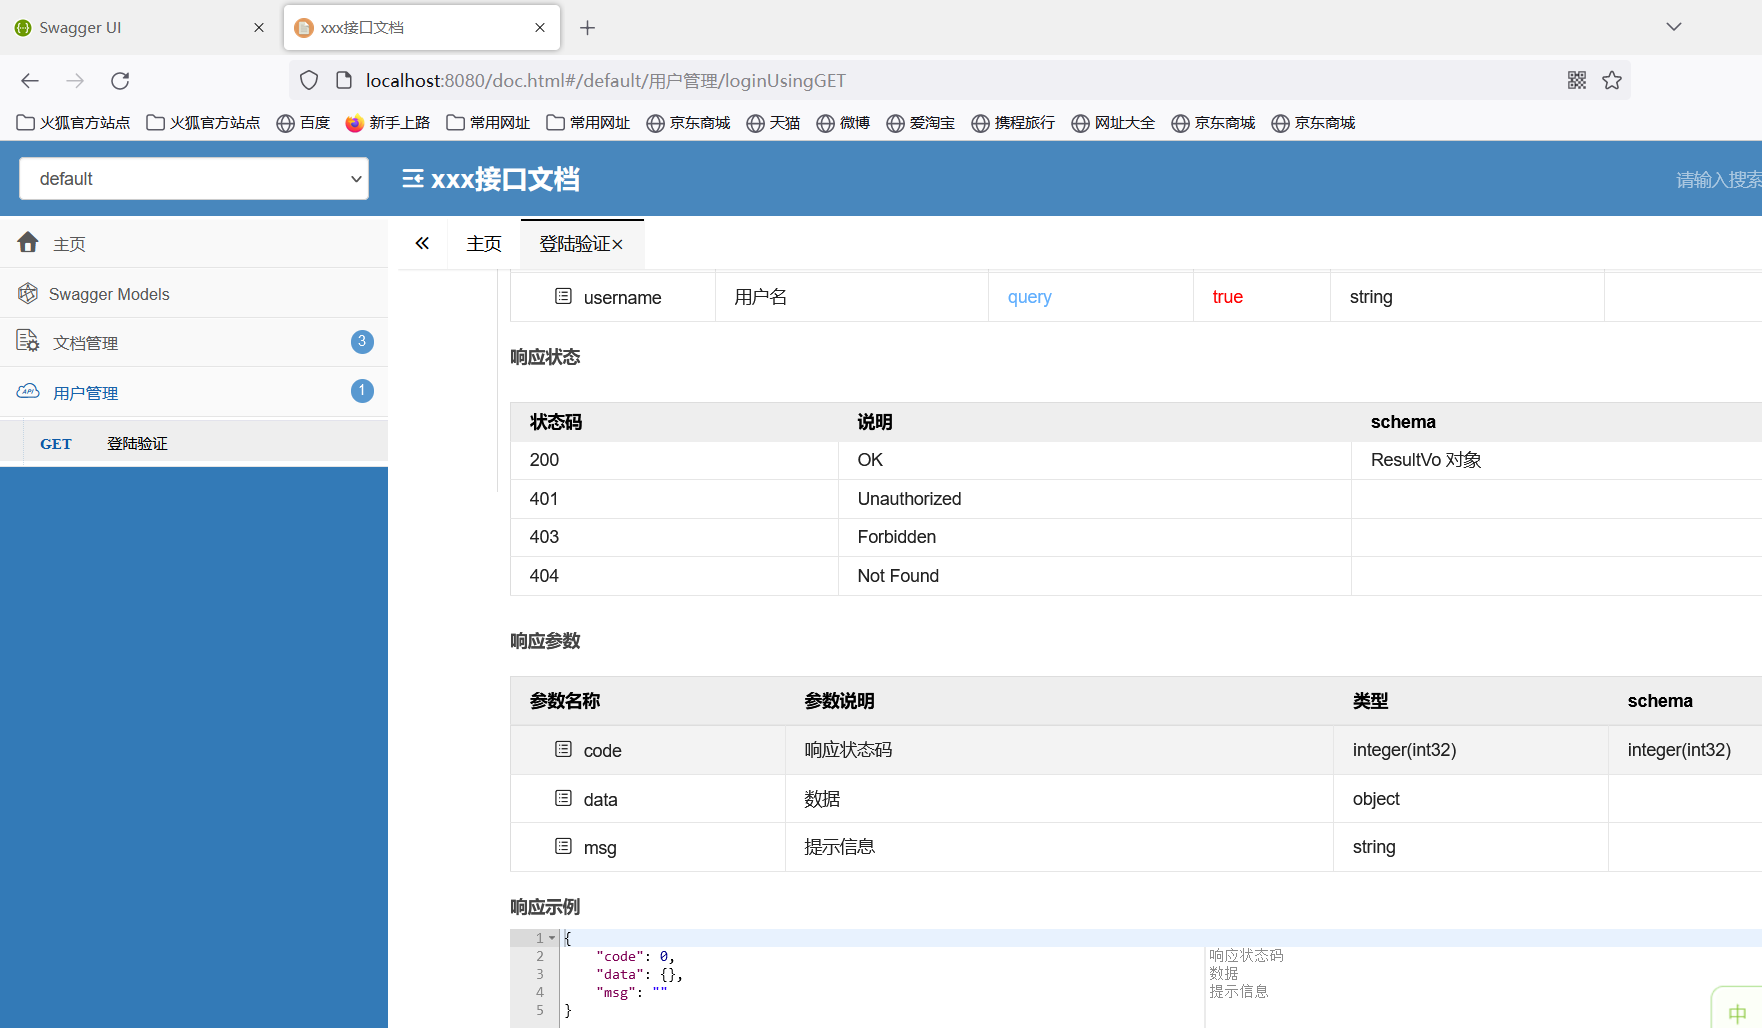


还等什么,赶紧装插件去~来源:cnblogs.com/luisblog/p/16861008.html